Microsoft 365
The following instructions assume your organization is using the Microsoft 365 service.
Registering an app in Azure Portal
1
Log in to the Azure Portal https://portal.azure.com and click the "App registrations" button.
2
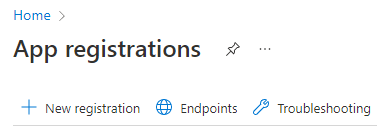
Click the "New registration" button
3
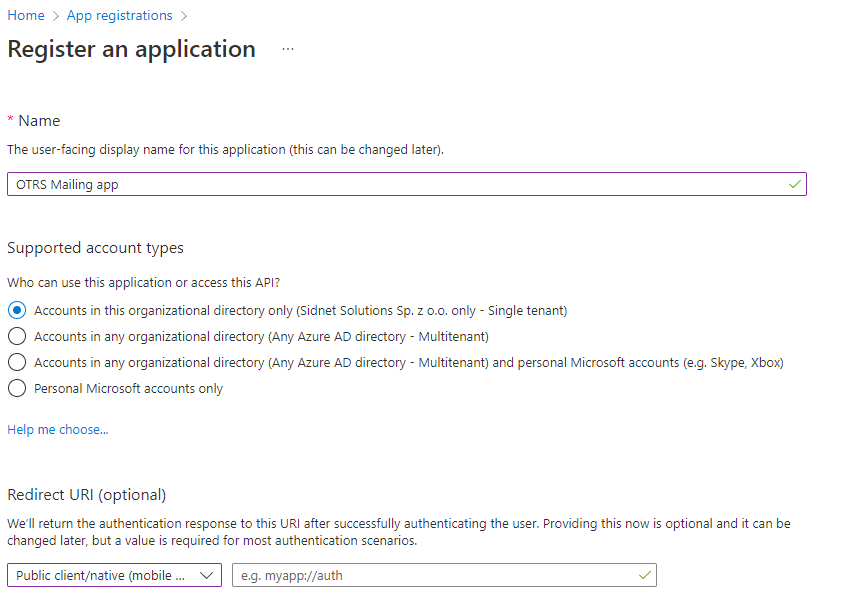
Fill the app registration form:
- Enter the name of the new application e.g. OTRS Mailing app
- in "Supported account types" section select "Accounts in this organizational directory only (CompanyName only - Single tenant)"
- in "Redirect URI" field just select "Public client/native (mobile & desktop)" and leave the text box blank.
4
Click on "Register".
5
Please save Application (client) ID value - you will need it later.

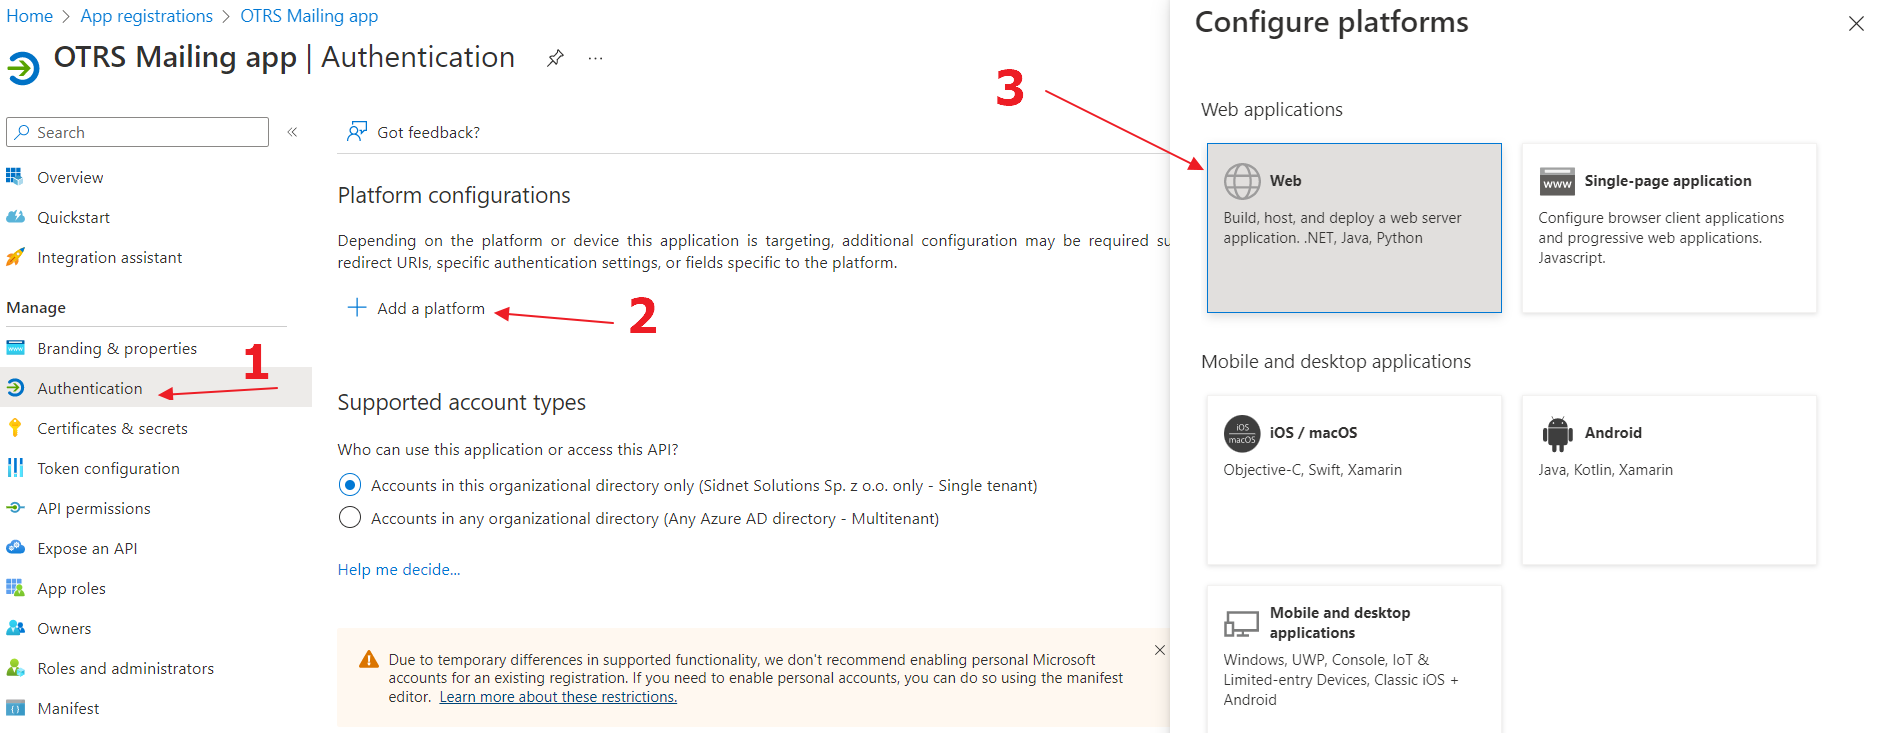
Authentication
1
Go to the "Authentication", click on "Add a platform" button and select "Web"
2
Enter only the "Redirect URIs" in the following schema:
${HttpType}://${FQDN}/${ScriptAlias}/get-oauth2-token-by-authorization-code.pl
e.g. https://support.example.com/otrs/get-oauth2-token-by-authorization-code.pl
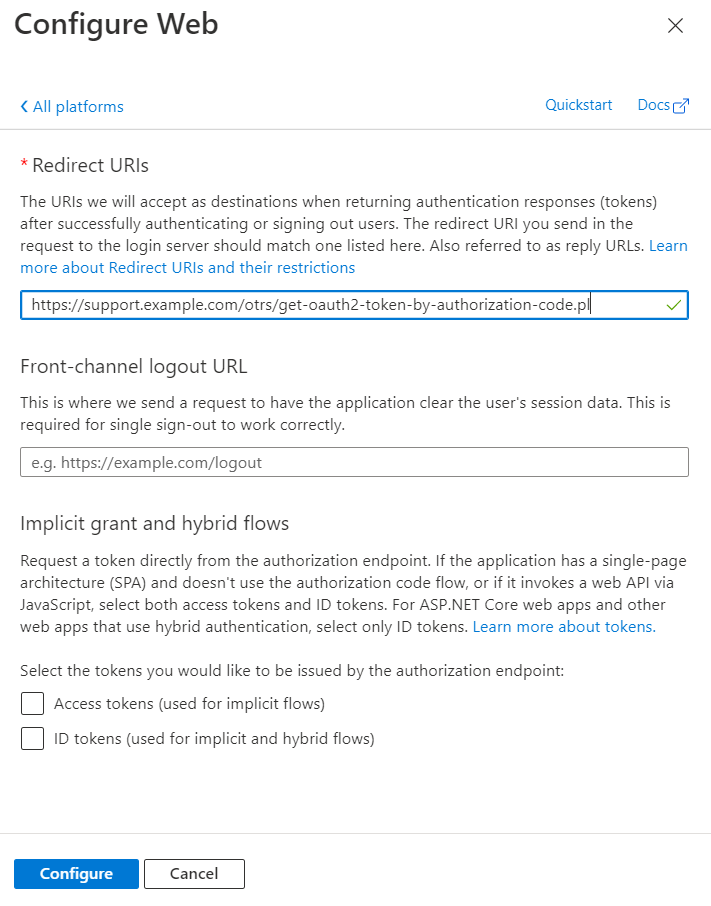
Please note that only https protocol is supported here.
3
Click on "Configure".
4
Now you can add more Redirect URIs e.g. test instance URI:
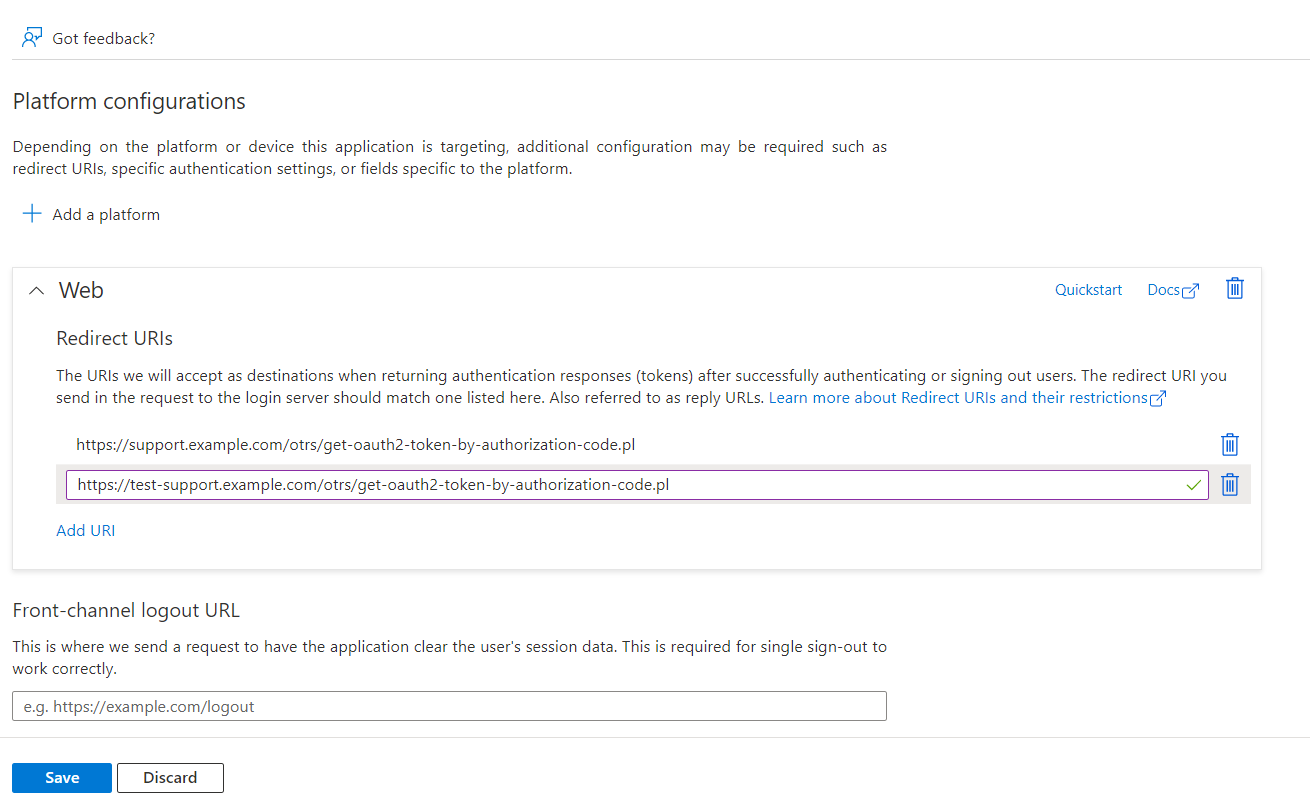
5
Click on "Save".
Certificates & Secrets
1
Go to the "Certificates & Secrets", click on "New client secret" button and select expiration date for the client secret.
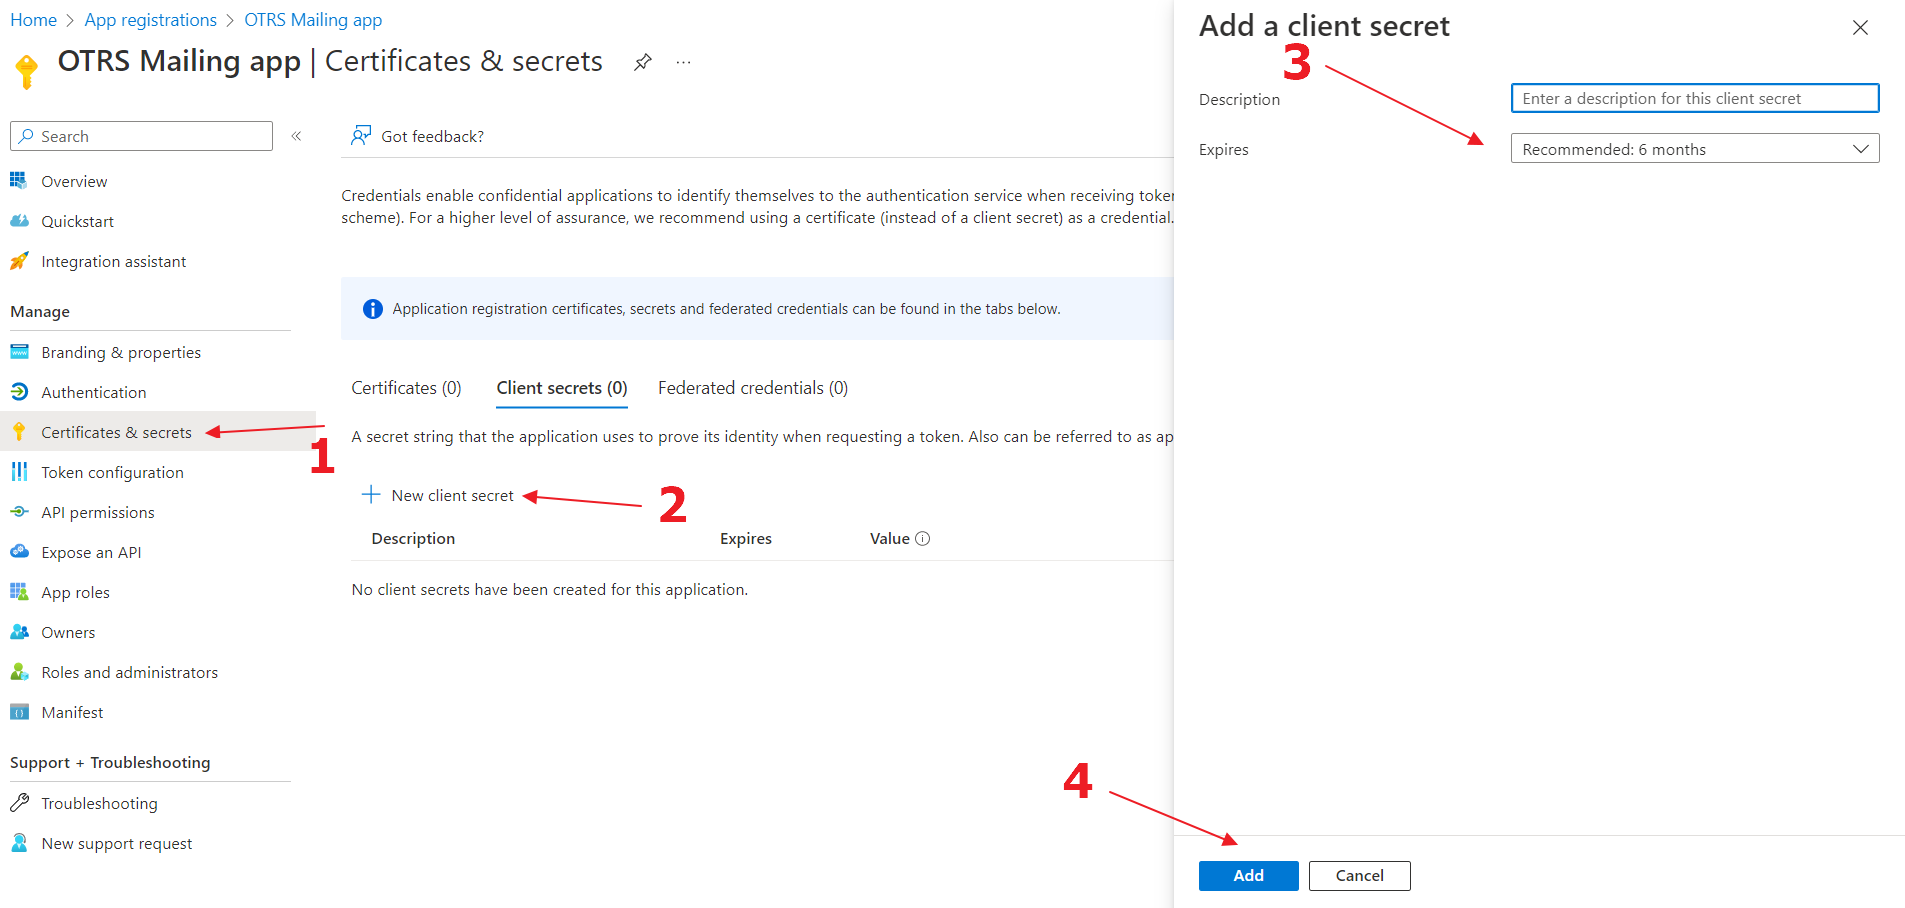
2
Click on "Add".
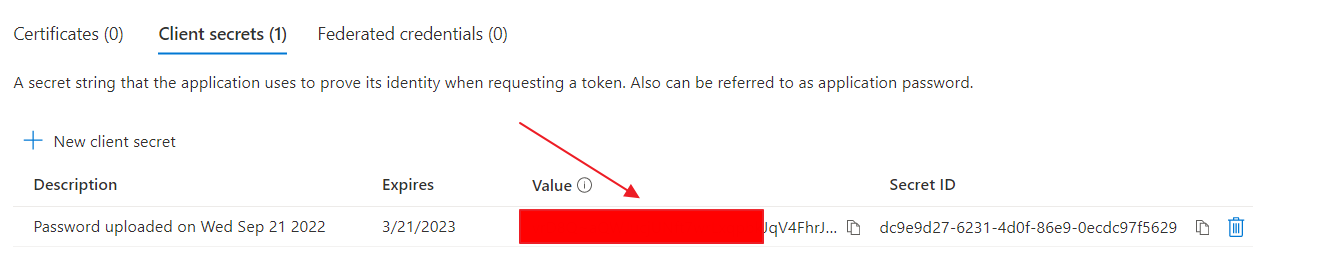
3
Please save the secret Value - you will need it later. Please note it will not be visible later.
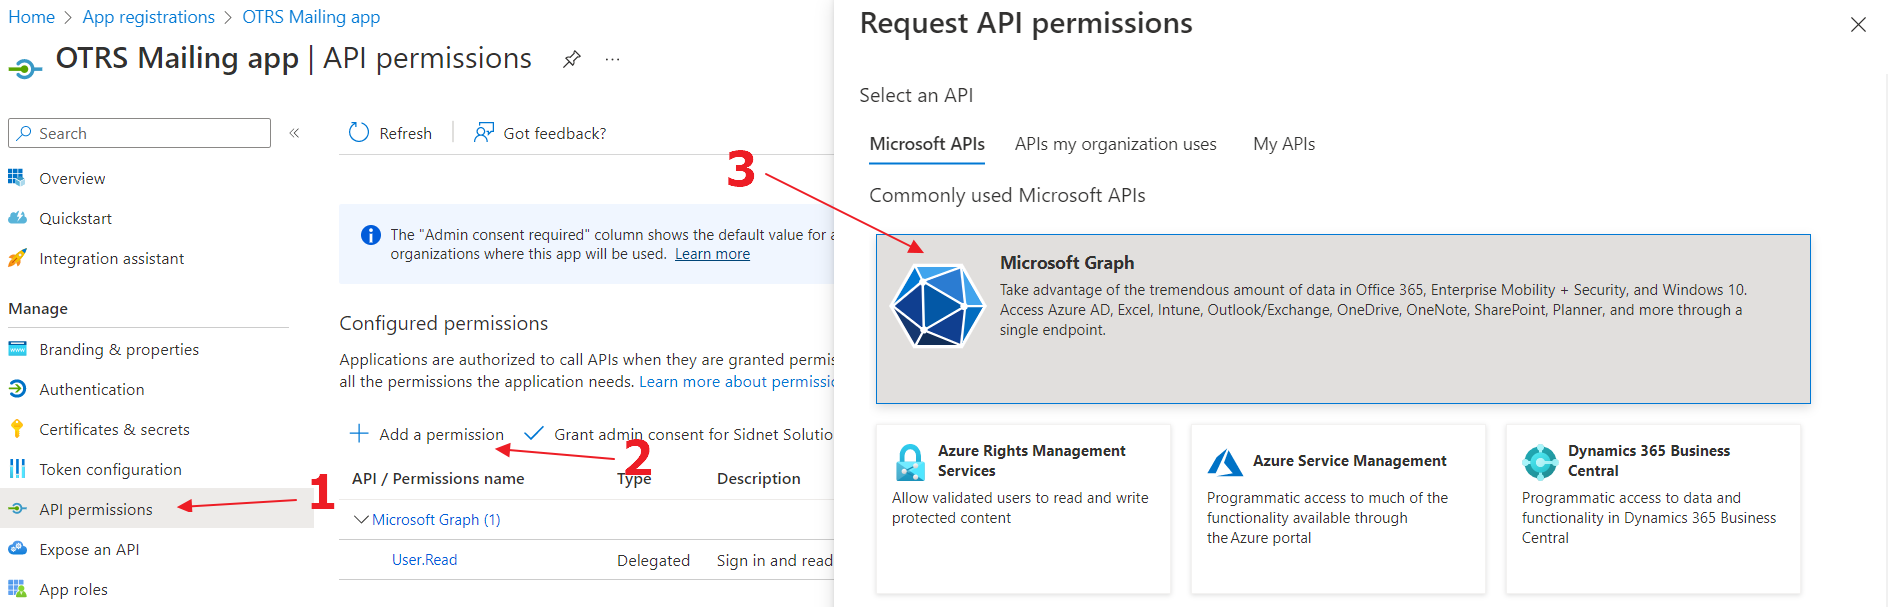
API Permissions
Important! If you use more than one e-mail account in OTRS, you can consider creating a technical account that will "mediate" access to other e-mail accounts. The technical account must have full access rights to all other e-mail accounts configured in OTRS.
You can check the delegation settings at https://admin.exchange.microsoft.com
Recipients -> Mailboxes -> select User -> Delegation -> Read and manage (Full Access) (if you also intend to send messages using the account, you should also delegate Send as permissions)
You must generate a token with the use of this specific technical account - otherwise, access to the accounts other than the one used to generate the token will not be possible.
1
Go to the "API Permissions", click on "Add a permission" button and select "Microsoft Graph"
2
Select "Delegated permissions"
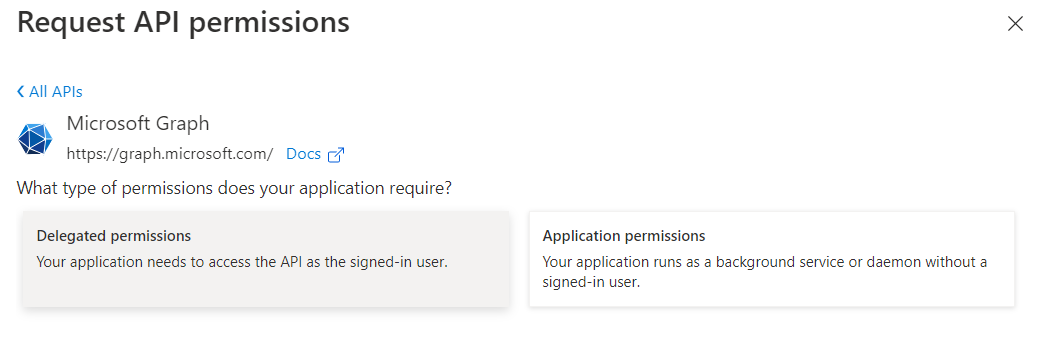
3
Find permissions and add them to your application

The final list of required permissions is: 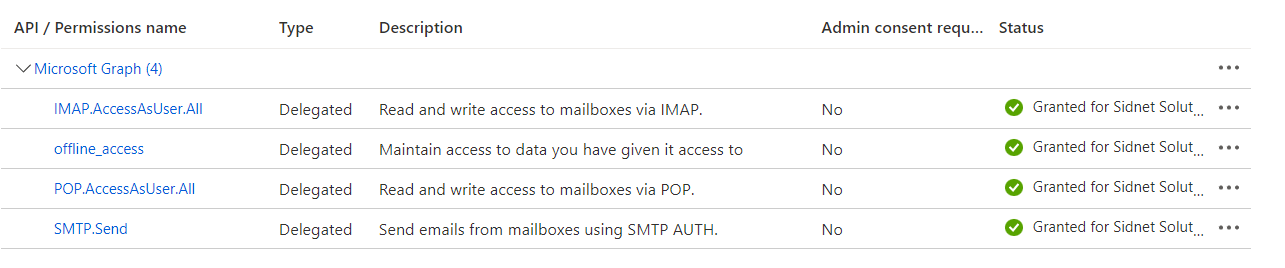
4
Click "Grant admin consent for CompanyName"
